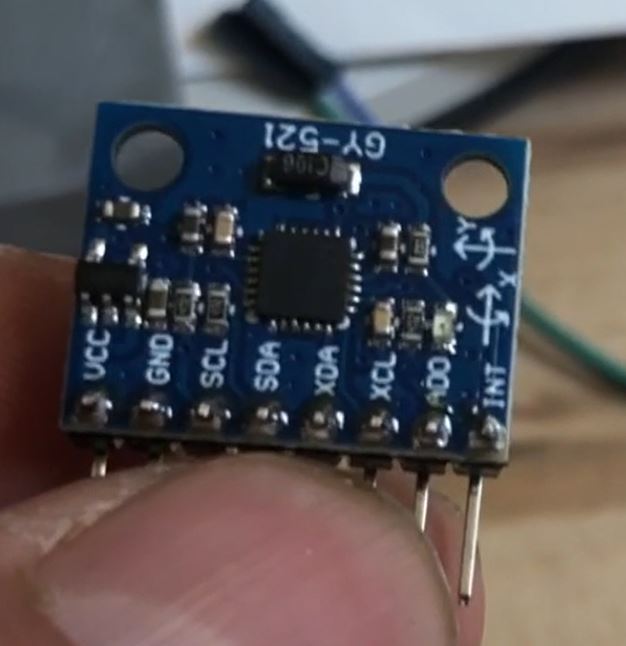
MPU 6050
Description
The MPU-6050 is a sensor that combines a 3-axis gyroscope and 3-axis accelerometer. Here it is used as the GY-521 module that can be directly connected to the ESP32/ES8266. The module is connected via the I2C bus.
more details for advanced users:
How to connect it electrically
The MPU 6050 is connected to the I2C bus. This is the same as where the display is connected.
- Pin15 is SCL (OLED_SCL)
- Pin4 is SDA (OLED_SDA)
Example connection to the ESP32 This shows all values of the MPU6050 on the OLED Display. It assumes the following connections:
- GND on GY521/MPU6050 to GND on ESP32
- VCC on GY521/MPU6050 to 3.3V on ESP32
- SCL on GY521/MPU6050 to OLED_SCL/Pin15/SCL on ESP32
- SDA on GY521/MPU6050 to OLED_SDA/Pin4/SDA on ESP32
Required Module and Files
- We use two modules:
- this is downloaded from https://github.com/micropython-IMU/micropython-mpu9x50
- the original files are at
There are other libraries available, e.g. https://github.com/adamjezek98/MPU6050-ESP8266-MicroPython
How to control it in MicroPython
from machine import I2C, Pin
from imu import MPU6050

# Pins according the schematic https://heltec.org/project/wifi-kit-32/
i2c = I2C(-1, scl=Pin(15), sda=Pin(4))

imu = MPU6050(i2c)

# print all values
print(imu.accel.xyz)
print(imu.gyro.xyz)
print(imu.temperature)

#print a single value, e.g. x value of acceleration
print(imu.accel.x)
Related Tutorial Videos
Program: Showing all Values on the Display
This shows all values of the MPU6050 on the OLED Display. It assumes the following connections:
- GND on GY521/MPU6050 to GND on ESP32
- VCC on GY521/MPU6050 to 3.3V on ESP32
- SCL on GY521/MPU6050 to OLED_SCL/Pin15/SCL on ESP32
- SDA on GY521/MPU6050 to OLED_SDA/Pin4/SDA on ESP32
from machine import I2C, Pin
import ssd1306
from imu import MPU6050
from time import sleep

# ESP32 reset pin for display must be 1 - this is pin16
# should be done in ssd1306.py - if not uncommend the next 2 lines
#pin16 = Pin(16, Pin.OUT)
#pin16.value(1)


# Pins according the schematic https://heltec.org/project/wifi-kit-32/
i2c = I2C(-1, scl=Pin(15), sda=Pin(4))

#display size
oled_width = 128
oled_height = 64
oled = ssd1306.SSD1306_I2C(oled_width, oled_height, i2c)

#link IMU to the i2C bus
imu = MPU6050(i2c)

while True:
  # read in analog value in v
  x = imu.accel.x
  y = imu.accel.y
  z = imu.accel.z
  xg = imu.gyro.x
  yg = imu.gyro.y
  zg = imu.gyro.z
  t = imu.temperature

  # print to serial line
  print("x:", x, "y: ", y, "z:", z)
  # empty display
  oled.fill(0)
  oled.show()
  # write v converted to a string onto the display at (0,0)
  oled.text("x:"+str(x), 0, 0)
  oled.text("y:"+str(y), 0, 9)
  oled.text("z:"+str(z), 0, 18)
  oled.text("xg:"+str(xg), 0, 27)
  oled.text("yg:"+str(yg), 0, 36)
  oled.text("zg:"+str(zg), 0, 45)
  oled.text("t:"+str(t), 0, 54)
  oled.show()
  sleep(0.3)

