Difference between revisions of "UBISS2024-Links"
Jump to navigation
Jump to search
| Line 6: | Line 6: | ||
* force the board in bootloader mode by connecting GND and REC pin with a wire: https://docs.arduino.cc/tutorials/nano-rp2040-connect/rp2040-openmv-setup/ | * force the board in bootloader mode by connecting GND and REC pin with a wire: https://docs.arduino.cc/tutorials/nano-rp2040-connect/rp2040-openmv-setup/ | ||
* plug the board into the USB port on your computer, it appears as a drive in your filesystem [[File:Drive01.png]] | * plug the board into the USB port on your computer, it appears as a drive in your filesystem [[File:Drive01.png]] | ||
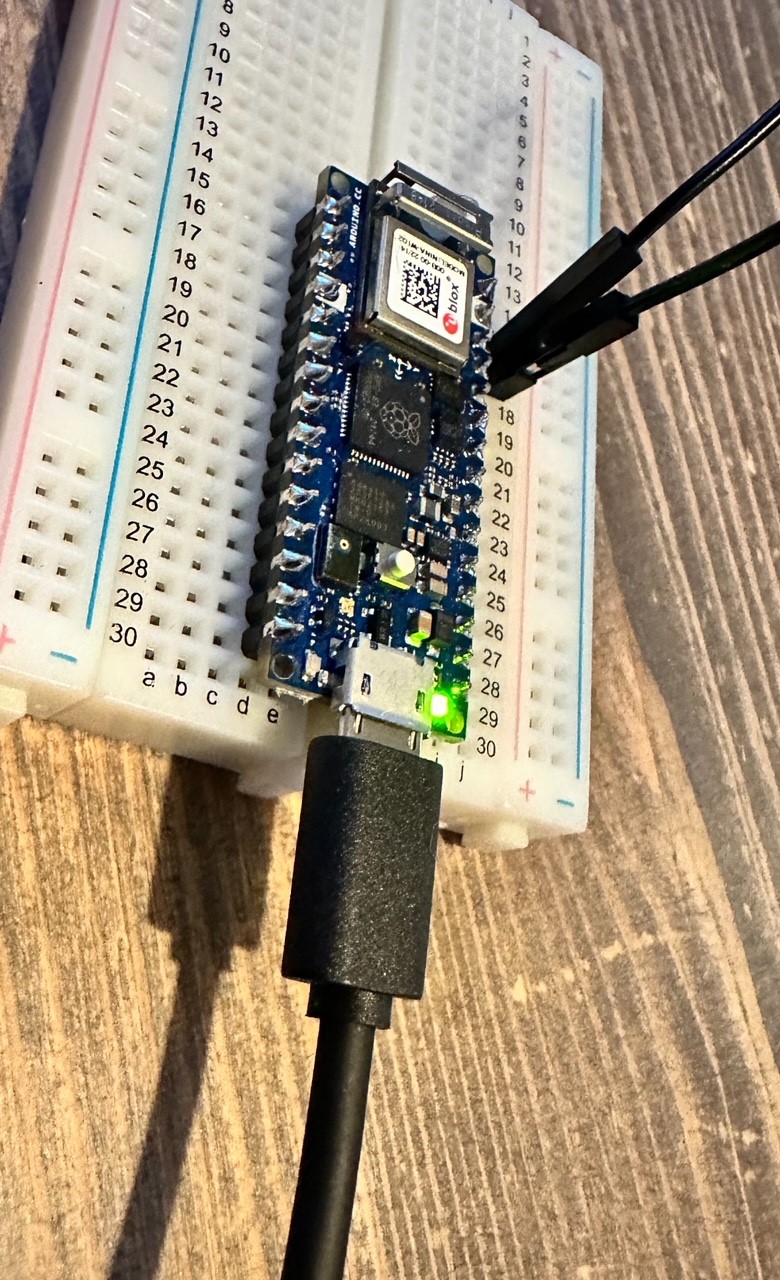
| − | * remove the wire between the GND and REC pin (before you copy the file onto the device) | + | * remove the wire between the GND and REC pin (before you copy the file onto the device) [[File:Arduino01.jpg]] |
* copy the firmware you downloaded on the drive that showed up in your file system | * copy the firmware you downloaded on the drive that showed up in your file system | ||
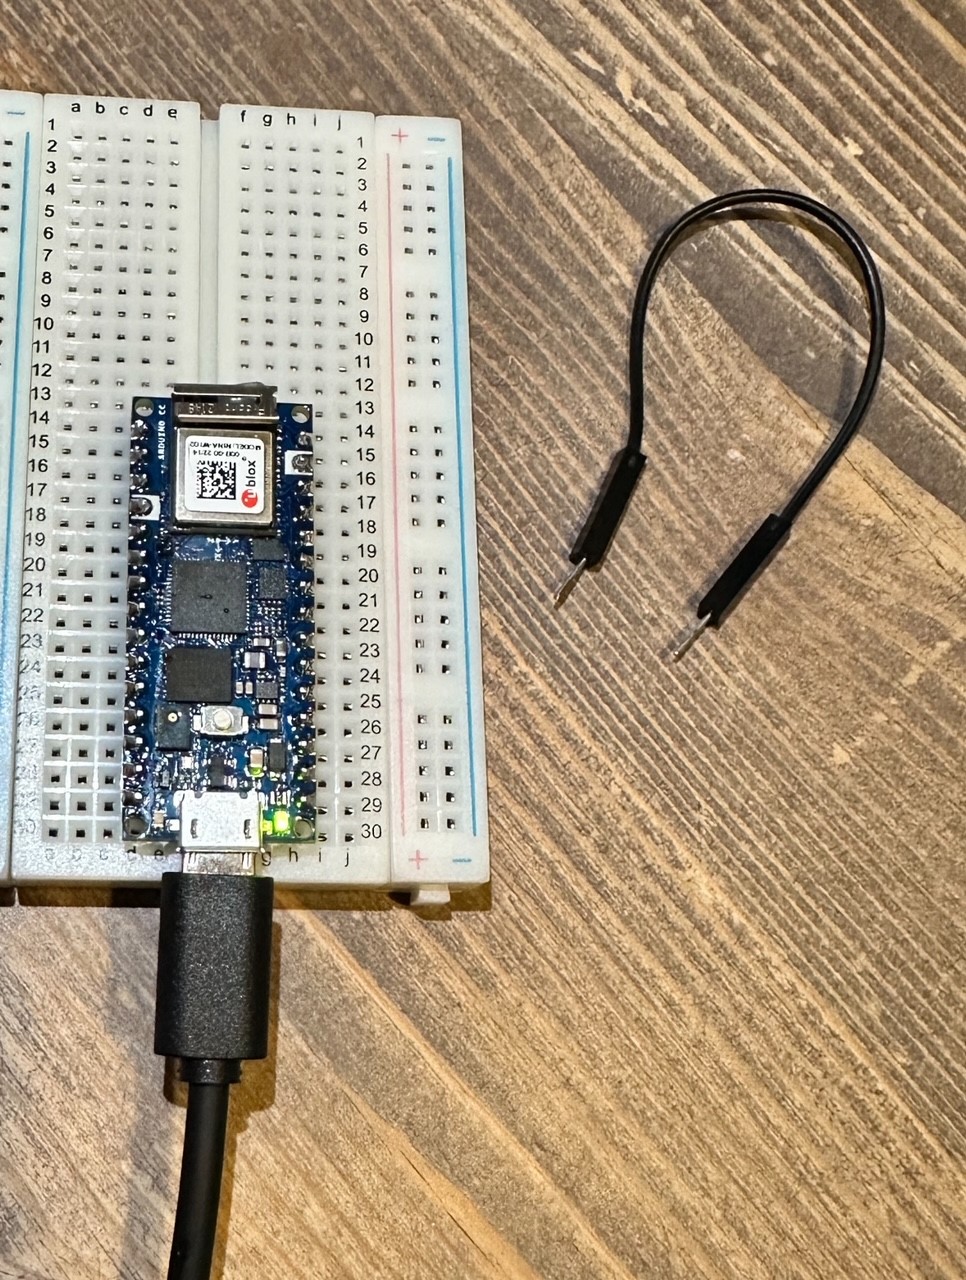
| − | * once it is completely copied to the device, unplug the board and plug in again | + | * once it is completely copied to the device, unplug the board and plug in again [[File:Arduino02.jpg]] |
* now you should be able to use Arduino Lab for Micropython development environment, https://labs.arduino.cc/en/labs/micropython | * now you should be able to use Arduino Lab for Micropython development environment, https://labs.arduino.cc/en/labs/micropython | ||
Revision as of 23:27, 10 June 2024
Contents
Getting Started
Install the Arduino Nano RP2040 Connect Firmware
- download the firmware for the Arduino Nano RP2040 Connect from https://micropython.org/download/ARDUINO_NANO_RP2040_CONNECT/
- unplug the board from the computer
- force the board in bootloader mode by connecting GND and REC pin with a wire: https://docs.arduino.cc/tutorials/nano-rp2040-connect/rp2040-openmv-setup/
- plug the board into the USB port on your computer, it appears as a drive in your filesystem
- remove the wire between the GND and REC pin (before you copy the file onto the device)
- copy the firmware you downloaded on the drive that showed up in your file system
- once it is completely copied to the device, unplug the board and plug in again
- now you should be able to use Arduino Lab for Micropython development environment, https://labs.arduino.cc/en/labs/micropython


alternative
Programming Environment for MiroPython
Testing your Environment: Get a LED to blink
Nano RP2040 Connect board details
MicroPython basics - Tutorial
List of Links
Micropython Basics
- https://docs.arduino.cc/micropython/#micropython-101
- https://docs.arduino.cc/micropython/basics/board-examples/
- https://www.codemotion.com/magazine/backend/getting-started-with-micropython-on-arduino-nano-rp2040-connect/
- https://www.penguintutor.com/programming/arduino-python
- https://micropython.org/
- https://docs.arduino.cc/micropython/micropython-course/course/installation/
- https://docs.arduino.cc/micropython/micropython-course/course/examples/
- https://wellys.com/posts/rp2040_micropython_1/
- https://micropython.org/download/RPI_PICO_W/
Python / Jupyter Notebooks for Hardware
- https://www.sketching-with-hardware.org/wiki/Jupyter
- https://towardsdatascience.com/micropython-on-esp-using-jupyter-6f366ff5ed9
- https://www.datacamp.com/tutorial/markdown-in-jupyter-notebook
- https://saturncloud.io/blog/how-to-import-python-file-as-module-in-jupyter-notebook/
- https://jupyter.org/install
- https://www.geeksforgeeks.org/install-jupyter-notebook-in-windows
- https://www.instructables.com/Micropython-on-ESP-Using-Jupyter/
Development environments
- https://labs.arduino.cc/en/labs/micropython
- https://labs.arduino.cc/en/labs/micropython-installer
- https://www.arduino.cc/en/software
Libraries
Data sheets and resources
- https://micropython.org/download/ARDUINO_NANO_RP2040_CONNECT/
- https://docs.arduino.cc/resources/pinouts/ABX00083-full-pinout.pdf
Tutorials
- https://docs.arduino.cc/tutorials/nano-rp2040-connect/rp2040-openmv-setup/
- https://docs.arduino.cc/tutorials/nano-rp2040-connect/rp2040-data-logger/
Machine Learning Basics
- https://github.com/eloquentarduino/everywhereml
- https://scikit-learn.org/stable/auto_examples/datasets/plot_iris_dataset.html
everywhereml
TinyML
- https://www.linkedin.com/pulse/arduino-truly-tiny-machine-learning-simone-salerno
- https://github.com/mocleiri/tensorflow-micropython-examples
- https://dev.to/tkeyo/tinyml-machine-learning-on-esp32-with-micropython-38a6